Showing posts with label craft for preschoolers. Show all posts

Monday, February 10, 2014

Handmade Valentine's Day Favors for Preschool Kids


One of my friends wanted to make handmade Valentine’s Day favors for her daughter's preschool classmates and asked me for ideas.  It had to be something her daughter could make with her.  I had seen many decorated pencil favors on Pinterest and had been meaning to try one of my own. Here is a picture of the adorable  butterfly pencil favors we (me , my friend and her sweet soon to be 5 year old daughter) made.


List of Supplies used:

 - Scalloped Circle punch (3.5 inches)
-  Small Hearts Punch
- Red, white and yellow card-stock
- Scissors
- Glue
- Double Sided Tape
- Pencils


Steps for making the project:
 - Punch red scalloped circles (depending on how many favors you plan to make) from the card stock using the scalloped circle punch.

-  Punch lots of red hearts using heart punch. You need four for each favor.

-  Cut out 1.5" x 0.5 " strips from yellow card stock.

-  Fold 3" x 11" white card-stock in half and draw butterfly wings as shown in the picture below. I cut one butterfly first and used it as a template to draw others for uniformity. Cut out the required numbers of butterflies.

-  Attach the butterfly cut out to the scalloped circle using double sided tape.

-  Now take the pencil and place it at the center of the butterfly. Attach the yellow strip to the butterflies over the pencil using double sided tape.


- Glue the hearts to the four corners of the yellow strip. And your adorable butterfly pencil favors are ready. Here is another picture of  bunch of  butterfly pencil favors we made.


You can easily add a lollipop, pen, pack of mints etc.  to customize this for favor of your choice. As an added touch my friend’s daughter wrote her name on a smaller scalloped circle with handmade from heart stamped on it and we attached it to the back of the butterfly favors.  I forgot to take pictures of that :( .


Kids can do most of the steps in this craft project with little help. Just use blunt scissors and help them with cutting the double sided tape.

I loved how these turned out and may end up making something similar for my son’s preschool classmates too. Let us know what you think about this project. We love to hear from our readers.

Happy Valentine’s Day!

Tuesday, March 19, 2013

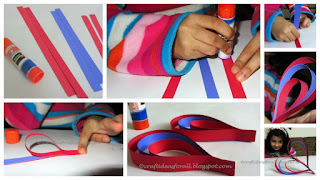
Valentine's day Paper strips Heart Craft Tutorial


For preschoolers Valentine's day begins as soon as they start making heart crafts in school. It was amazing to see my daughter (Anna) involved so much in this year's Valentine's day celebration. For her Valentine's day is all about making crafts for someone you love. They have been making Valentine's day crafts, puzzles, mazes etc the whole first two weeks of February. She had to take something for her friends for the Valentine's day party in her class. She wanted to make something for her teachers too.This is what we came up with. It was simple, different and based on the teacher's favorite color we decided which color paper to use.

Supplies:
 -Color Print Paper strips: 0.5 inch wide and length based on how big heart you want. We used 2 strips each of 5", 6",7.5" (in your choice of color)
 -Stapler or Glue
-Fish line or Ribbon
 -Color Pen

 Instructions:
For the first loop using 3 strips.
1. Apply glue on one end of the strip measuring 7.5",place the end of 6" and press.
2. Now apply glue on this and place end of 5" strip. Refer pictures.
3. Make a loop using the 5" (innermost) strip and glue the end as shown. 
4. Repeat with the rest of the strips. Make the second loop by repeating the above steps. Glue or staple these two loops that you made.


Variations
-Anna decided to write on the outermost strips for her teacher. So we used white strips for that.
-We also used the teacher's favorite color to decide who is getting which heart.

-She later decided to make one for her favorite aunt in the colors which are her son's and Anna's favorite.This one she made with no help from me at all.
 Notes:
-We found that glue worked better than staples so in the last one we used glue to stick the loops together.
 -To attach string we used stapler.(optional)
 -Parents should do the stapler part for younger kids and supervise for little older kids. For her friends we got some heart shaped erasers and lollipops. We packed it in cute packing. It was an extension of a craft we did earlier. We will share that with you soon.

Monday, December 10, 2012

Chenille Stem Star Ornament


Like last year, this year also our Christmas tree was up on Dec 1st. The decoration is in progress. With a new baby at home I hardly get time to make ornaments. But my 4 yr preschooler is ensuring we are doing some or the other Christmas related craft almost every 2 days. I am not getting enough time to post all of them but I will definitely try to share these ideas as and when time permits. In my daughter's preschool class they asked every child - Who do you want to gift on Christmas and what?My daughter,who is usually Daddy's girl and a big sister to her little brother, replied 2 star ornaments for my Mom. Lucky me!! And who else will she ask how to make them? So here I am helping my kiddo to make 2 star ornaments to be gifted to me.

Jokes apart I really admire her eagerness to learn and create when it comes to crafts. She is a different kid when she is doing crafts.

Supplies you will need:
-Chenille stem or pipe cleaner- red (or color of your choice)
-Pencil -Golden wire or bow ribbon
-Star shape cookie cutter
-Fish line or mono filament
-Safety scissors
Instructions :
Step 1 Make a loop with pipe cleaner using pencil as shown.  
Step 2 Continue wrapping the pipe cleaner around the cookie cutter to get the star shape. Secure the end and cut-off any extra pipe cleaner.
Step 3 Wrap the golden ribbon or wire around the star shape so it looks filled and beautiful.  
Step 4 Hang the ornament with mono filament or fish line. You can use ribbon also if you prefer that.  
Note :  My daughter made this ornament herself with very little help. Some kids might need some more hand holding depending on how much practice they have for crafting. Some kids might find the ends of pipe cleaner a little sharp, parents please supervise little kids for this craft.

Monday, December 19, 2011

Holiday Greeting Cards for Preschoolers


Most of the kids in US have their winter break going on now. Usually the last day at school before the winter break is the day they have a little holiday celebration. That was on Friday Dec 16 at my daughter's preschool. Thursday night she decided she wants to give handmade holiday greeting cards to all her friends. Frankly I was little tired and was kind of reluctant. It was a very busy day and I had an order to complete which I had to ship early morning. But I didn't have the heart to curb her enthusiasm.
So we decided to keep it simple and quick so that we can make 15 cards and where she has to do at least 75% of the work.

This is how we made it.

Supplies you will need:
- Red Card stock Letter size
- Paper trimmer preferable
- Score board (optional but recommended)
- Bone folder
- Ruler
- Edge punch (optional)
- Scissors
- Silver stamp Pad
- Markers : Silver or any color that is visible on Red card stock.
- Peel and stick Felt : Green and brown
- Rhinestones red or any your like

Step wise instructions
-------------------------

1. Cut the card stock in desired size. We made 3 fold card so I cut the letter size paper in 3.5" width from the 8.5" side of the paper. So you will get 3 cards from one paper. Refer the picture.

2. Take one of the card piece and on scoring board score at 3.5" and 7" from the left edge of the paper.

3. Use edge punch to punch the edge of the third part of the card. Refer picture.

4. Draw a triangle on the back side of green the peel and stick felt. Draw a little rectangle on the back of brown peel and stick felt. Cut them using scissors. Kids can cut this using safety scissors or parents can help.

5. Let the kids stick the felt pieces and rhinestone as shown in pictures.
6. Ink the punched edge with silver stamp pad. Just run the stamp pad on the edge. This is an optional step.
7. Use the silver marker to write Happy Holidays inside the card.
8. Let your preschooler write their names if they have learnt it, my daughter did. If not them parents can help but let them tell the alphabets of their names. Most of the kids know them by now.

The cards are ready to be given. As they are 3 folds you don't need envelope if you want to keep them cute and casual. We just tied all of them together by a golden ribbon. Her friends loved it.


Happy Holidays!!

Tips:
1. Plan in advance, my daughter was a little tired after writing her name 10 times.
2. Handmade cards are best for preschoolers, they learn making them and have lots of fun too.
3. If you do not have scoring board simple use bone folder with metal ruler. That should do the trick.
4. If you do not have edge punch you can use decorative scissors too or just leave it as straight edge.

Wednesday, November 2, 2011

Spooky Scary Village DIY Halloween Decoration


This year Halloween was extra special as my daughter and my husband were all so excited and crafty about it. Really appreciate the effort made by my crafty daughter and hubby. I was all too busy preparing for The Craft festival I have to participate in. Though I did provide a helping hand here and there like handing the scotch tape or finding the paper or crayon.
It was fun to watch her talking to the Pumpkin Bat,Mommy's Pumpkin, Incredibles Pumpkin,Spider Pumpkin, Ghost, Scary village house (made from lego). She is reading stories to them since it was put on display. Halloween is over and she still wants her scary village and the people pumpkins that live there. It is going to stay for a while looks like.

Salient features:

-We have used the faux spider web for the first time. It was a learning experience to figure out how exactly it will become a web.

-All the bugs, bats etc from kids tube mini bugs collection (National Geography) were put to good use and they hang really well on the web.

-All toilet paper roll tube crafts made good decoration.

-Crafts done by my daughter at her friend's house made good deco too. You see the scary village has to have a tree (again a preschooler's imagination).
-Mega Blocks for making a scary tower.
-Lego blocks for making a cute little Ghost.
-Paper Crafts made at Preschool(Pumpkin, Owl, Fall wreath) all were there.
-Pumpkin paper Lantern.
-Dried and silk fall leaves.
-The different levels for better display were created using different size of cardboard boxes and covered with a halloween theme black and orange table cover.
-Lots of Scarecrow because we need lots as we need to scare more.

-Paper silhouttes for the window decoration of a really scary village made with black construction paper, white crayon and hand cut foams in the shape of bat, ghost, pumpkin.

-Paper Silhouttes of bat and witch too.Added later as it is incomplete without witch.

- The best an innovative idea I must say was using Humidifier to give the haunted effect from colored smoke. Covered the humidifier with white garbage bag and made eyes with foam stickers, toilet paper roll to make a chimney and the color from the disco ball added the haunted feel to it.

-All trick or treat containers found a place in this scary village too. Whether it is Green Monster from Happy meal from Mcdonalds or the famous pumpkin container.

- And 2 days before Halloween we decided, we should definitely have a carved pumpkin and here you go ..a smily pumpkin (Pumpkin has to be happy) was carved to welcome all our cute and scary guests for the little Halloween Party we had. We used a camping light lantern to light it as the LED tea light we had were not giving enough light and we were really running out of time to get one with more power.

And so on...many more little toys, incomplete yarn doll, cats etc.

I guess we will remember Halloween 2011 for a long time to come. Hope you all had a wonderful time decoration and trick or treating.

Tuesday, October 11, 2011

Crazy Incredibles Pumpkin Craft for Preschoolers


Like last year this year also we participated in the Pumpkin decoration activity for kids, organised by Michaels
My 3.5 yr old daughter was so excited for the event. She just could not wait for the event to begin. You have to buy the pumpkin and they will provide the supplies and parents or care taker has to help out kids.
This crazy pumpkin design is 100% her own creation. I guess she was actually inspired by the one they kept for demo purpose. But the color combination and the eyes are all her imagination.
She had a blast making this one. It took a long time but considering her age I guess that was expected.We were very happy to see her happy.

Supplies you will need:
-Faux pumpkin
-Self sticking Foam sheets-black and white
-Pom Poms different sizes, different colors
-Google eyes :Jumbo size
-Chennile stems or pipe cleaners
-Safety scissors
-Pinking scissors
-craft knife
-Tacky Glue
-Feathers various colors
-Pencil/marker

Step wise instructions on how to make this Incredibles inspired Crazy Pumpkin
1. On a self sticking black foam sheet draw the shape of the eye mask. Cut it.SHould be done by adults or may be Adult supervision if the child is used to cutting.

2. Similarly on a black self sticking foam sheet draw the smile of the pumpkin.Cut it.
3. On a self sticking White foam sheet draw pointed crazy teeth and cut with pinking scissors or normal scissors are also fine.
4. Use tacky glue to stick pompom. For the rest of it normal glue is also fine.
5.Stick the feathers, google eyes etc.
6. For the crazy curly hair, roll the chennile stems or pipe cleaners on a pencil or marker and take them out.Some kids need Adults help to do this till they get hang of it.
7. At the end of the curly hair, just insert a little pom pom of contrasting color.
8. To insert the chennile stem hair, use something pointed to make hole, like pointed scissors or craft knife. Adults should make the holes and let the kids insert the hair.

Use you imagination to make it more crazy or different crazy. The possibilities are endless.
Have fun. Happy Halloween!!.

Tips:

-Use tacky glue in moderation. Works really well with little amount and sticks pretty quickly.I loved this one as kids get frustrated when things take time to stick.If you take too much tacky glue it will take longer time to dry and hence does not serve the purpose.
-For making hair, little kids might get tired, Adults please help them. Little hands get tired pretty quickly.